
Connecting Nodes
Connections define the flow of your workflow - they tell CiraIQ which node to execute next.
Basic Connection
Section titled “Basic Connection”The simplest workflow is a straight line:
How to Connect
Section titled “How to Connect”Locate Output Handle
Find the small circle on the right edge of the first node
Click and Drag
Click the output handle and drag towards the next node
Release on Target
Drop the connection on the input handle of the target node
 Creating Connection - Show step-by-step connection process
Connection Types
Section titled “Connection Types”Sequential Connections
Section titled “Sequential Connections”One node leads to the next in order:
[Start] → [Step 1] → [Step 2] → [Step 3] → [End]When to use: Simple, linear workflows
Branching Connections
Section titled “Branching Connections”Workflow splits based on conditions:
[Trigger] → [Condition] ├─ True → [Action A] └─ False → [Action B]When to use: Different outcomes based on data
Data Flow
Section titled “Data Flow”When nodes are connected, data flows through them:
Google Sheets
Outputs: Row data
Uses: Row data in message
Each node can access data from all previous nodes in the workflow. This is how you can use form data in emails, API responses in messages, etc.
Connection Rules
Section titled “Connection Rules”✅ Valid Connections
Section titled “✅ Valid Connections”- Trigger → Action
- Action → Action
- Action → Logic → Action
- Logic → Multiple branches
❌ Invalid Connections
Section titled “❌ Invalid Connections”- Action → Trigger (workflows must start with triggers)
- Node → itself (creates infinite loop)
- Multiple triggers in one workflow (use separate workflows)
Don't create circular connections (A → B → A). This causes infinite loops and will fail.
Managing Connections
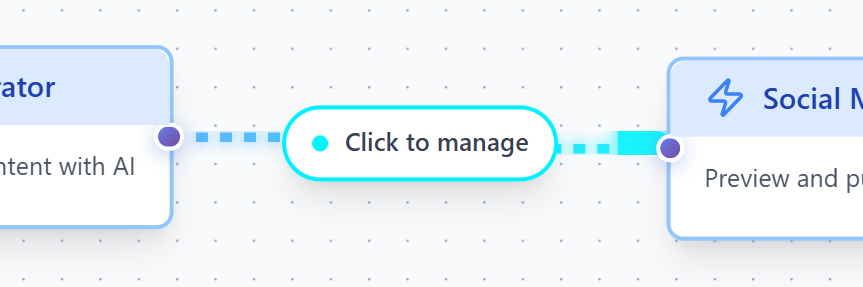
Section titled “Managing Connections”Delete a Connection
Section titled “Delete a Connection”Method 1: Click the line and press Manage
Method 2: Right-click the line and select “Delete”
 Deleting Connection - Show context menu
Reconnect a Node
Section titled “Reconnect a Node”- Delete the old connection
- Create a new connection to different node
Move Connection Point
Section titled “Move Connection Point”Some builders allow dragging the connection endpoint to a different node.
Visual Feedback
Section titled “Visual Feedback”Connections provide visual feedback:
- Solid Line - Valid, active connection
- Dashed Line - Conditional branch
- Red Line - Configuration error
- Animated - Data flowing during execution
Best Practices
Section titled “Best Practices”- Keep connections short and direct - Avoid crossing lines when possible - Use clear node placement (left to right) - Test each connection before adding more
Common Patterns
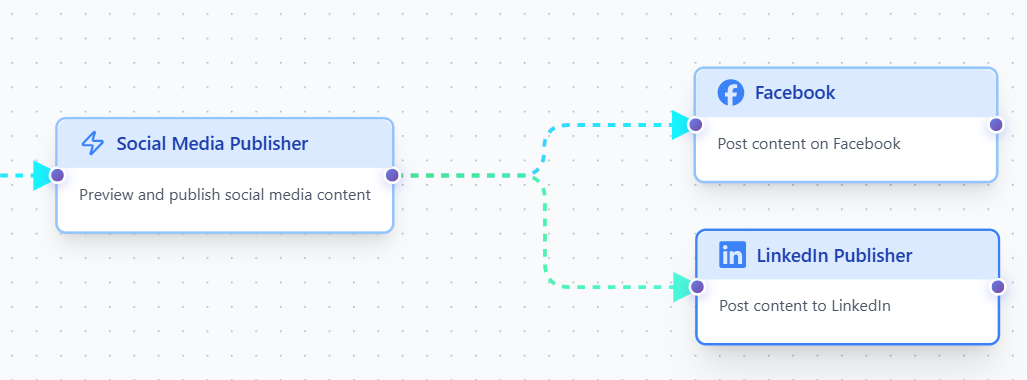
Section titled “Common Patterns”Fan-Out (Parallel Actions)
Section titled “Fan-Out (Parallel Actions)”One trigger, multiple actions:
[Trigger] ├─ [Email] ├─ [Slack] └─ [Database]All actions run in parallel.
Chain (Sequential Actions)
Section titled “Chain (Sequential Actions)”Each action waits for the previous:
[Trigger] → [Fetch] → [Transform] → [Send]Troubleshooting
Section titled “Troubleshooting”Can’t create connection?
- Check if target node accepts inputs
- Ensure source node has output
- Try zooming in for better precision
Connection disappears?
- Check if nodes are compatible
- Look for error messages
- Verify both nodes are saved
Next Steps
Section titled “Next Steps”- Testing Workflows - Test your connections
- Logic Nodes - Create branches
- Examples - See connection patterns