
Workflow Builder Guide
The Workflow Builder is where you create and edit your automations using a visual drag-and-drop interface.
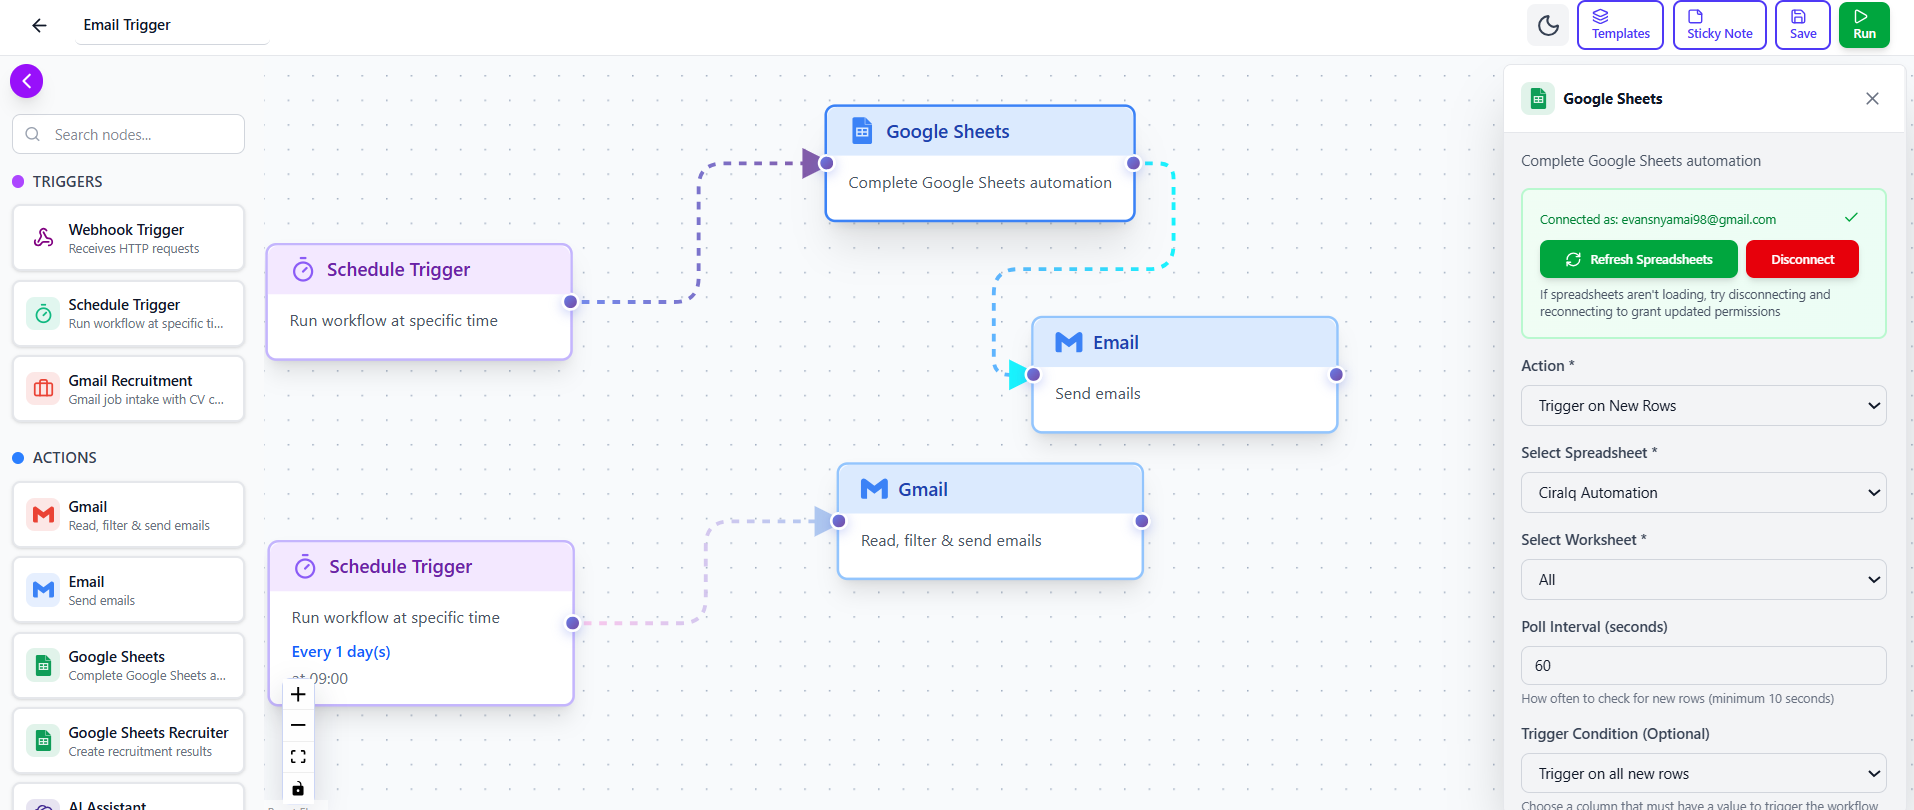 Workflow Builder Interface - Full screen view with labels
Interface Overview
Section titled “Interface Overview”The builder has three main areas:
1. Node Library (Left Sidebar)
Section titled “1. Node Library (Left Sidebar)”This is your toolbox containing all available nodes:
- Triggers - Ways to start workflows
- Actions - Things your workflow can do
- Logic - Decision-making tools
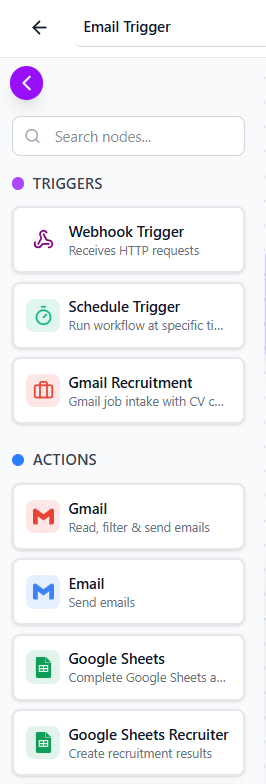 Node Library - Show the sidebar with node categories
2. Canvas (Center)
Section titled “2. Canvas (Center)”The main workspace where you build your workflow by dragging and connecting nodes.
Features:
- Zoom in/out
- Pan around
- Grid snapping
- Auto-layout
- Scroll wheel to zoom - Click and drag background to pan - Double-click a node to edit it
3. Properties Panel (Right)
Section titled “3. Properties Panel (Right)”When you click a node, this panel shows its configuration options.
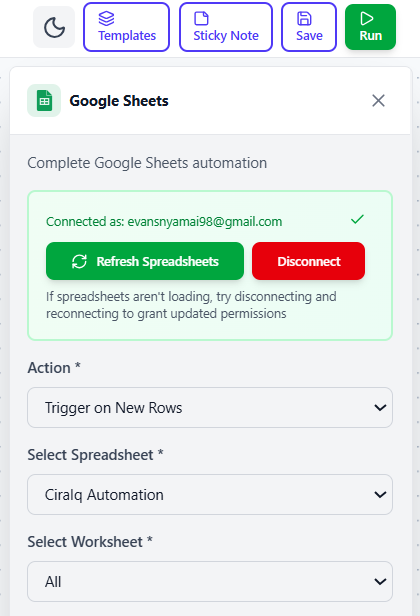 Properties Panel - Show node configuration interface
Adding Nodes
Section titled “Adding Nodes”Find the Node
Browse the left sidebar or use the search box to find the node you need.
Drag to Canvas
Click and hold the node, then drag it onto the canvas and release.
Position It
Place the node where you want it in your workflow flow.
Configuring Nodes
Section titled “Configuring Nodes”Click any node to open its configuration panel:
- Name: Give it a descriptive name
- Settings: Fill in required fields
- Advanced: Optional settings (if available)
Node Configuration - Show filled configuration form
Connecting Nodes
Section titled “Connecting Nodes”To create your workflow flow:
- Find the Output Handle - Small circle on right side of node
- Click and Drag - Draw a line to the next node
- Connect to Input - Release on the target node’s input handle
Node A
Output handle →
Node B
← Input handle
Toolbar Actions
Section titled “Toolbar Actions”Top toolbar buttons:
- Save - Save your workflow
- Run - Test the workflow
- Activate/Deactivate - Toggle automatic execution
- Settings - Workflow settings
- Delete - Remove workflow
Keyboard Shortcuts
Section titled “Keyboard Shortcuts”Speed up your workflow building:
| Shortcut | Action |
|---|---|
Delete | Delete selected node |
Ctrl + Z | Undo |
Ctrl + Y | Redo |
Ctrl + S | Save |
+ / - | Zoom in/out |
Space + Drag | Pan canvas |
Visual Indicators
Section titled “Visual Indicators”Understand node states at a glance:
- Green Border - Node is configured correctly
- Red Border - Configuration error
- Blue Highlight - Node is selected
- Gray - Node is disabled
Best Practices
Section titled “Best Practices”- Arrange nodes left to right (trigger → actions) - Use vertical spacing for parallel actions - Group related nodes together - Name nodes descriptively - Keep workflows simple and focused
Common Actions
Section titled “Common Actions”Duplicate a Node
Section titled “Duplicate a Node”- Right-click the node
- Select “Duplicate”
- Position the copy
Delete a Connection
Section titled “Delete a Connection”- Click the connection line
- Press
Deletekey
Move Multiple Nodes
Section titled “Move Multiple Nodes”- Click and drag to select area
- Move selected nodes together
Next Steps
Section titled “Next Steps”- Connecting Nodes - Learn connection techniques
- Testing Workflows - Test before going live
- Managing Workflows - Organization tips